

Have you ever visited a website that showed you the weather in real time? This feature is made possible through weather APIs, which provide up-to-date weather data that can be integrated into websites and mobile applications. In this article, we'll explore how to integrate weather API into your website using WeatherAPI as an example.
Getting the API
Firstly, you need to sign up for an API key on the WeatherAPI website. Once you have your API key, you can start integrating weather data into your website.

We will be using this API key in our API URL.
Once we have our API, now let's write some code for our website.
Building the UI of the website:
HTML:
index.html file
<!DOCTYPE html>
<html lang="en">
  <head>
    <!-- Title of the Website -->
    <title>Weather API</title>
    <!-- Using Bootstrap framework for css -->
    <link
      rel="stylesheet"
      href="https://cdn.jsdelivr.net/npm/bootstrap@4.6.0/dist/css/bootstrap.min.css"
      integrity="sha384-B0vP5xmATw1+K9KRQjQERJvTumQW0nPEzvF6L/Z6nronJ3oUOFUFpCjEUQouq2+l"
      crossorigin="anonymous"
    />
    <!-- Fontawesome to get icons -->
    <script
      src="https://kit.fontawesome.com/d676f25411.js"
      crossorigin="anonymous"
    ></script>
  </head>
  <body>
    <body style="background-color: black">
      <div class="text-center my-5">
        <h1 style="color: white">
          <legend>Check your City's Weather</legend>
        </h1>

        <!-- form -->
        <form class="form-group text-center mt-4">
            <!-- field -->
          <fieldset class="d-flex justify-content-center">
            <input
              class="form-control w-25"
              placeholder="Enter City Name"
              type="text"
              name="cityName"
              id="cityName"
            />
            <!-- search button -->
            <button class="btn btn-dark" type="button" id="getApi">
              <i class="fas fa-search"></i>
            </button>

          </fieldset>
        </form>
      </div>
      <div class="container text-center px-5">
        <div class="d-flex justify-content-center" id="output"></div>
      </div>

      <!-- Calling the javascript file -->
       <script src="index.js"></script>
      <!-- Done calling js file -->

    </body>
  </body>
</html>
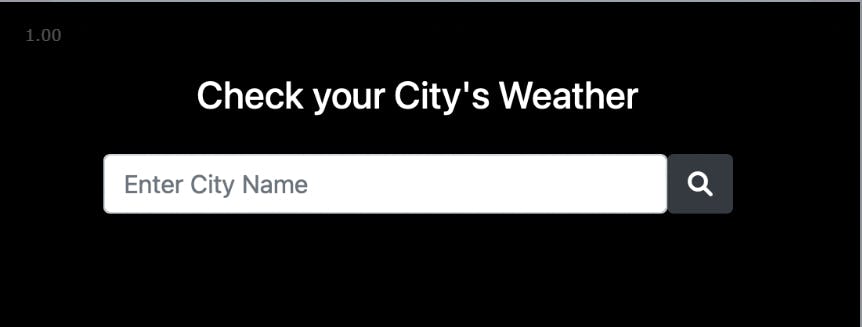
Output:
The above block of Html code will give us an output like this.
Diving in Javascript:
Now let's add the functionality with Javascript
index.js
document.getElementById('getApi').addEventListener('click', getApi);const apiId= 'e2d2fe2c76f848a2b1570500222607';function getApi() {
    var CityName = document.getElementById('cityName').value;console.log(CityName)const url = `http://api.weatherapi.com/v1/current.json?key=${apiId}&q=${CityName}&aqi=yes`;console.log(url);fetch(url)
    .then((res) => res.json())
    .then((data) => {
        let output = `
            <div>
                <div style="color:black; width:10rem; background-color:white; border-radius: 10px;" class="p-3">
                    <p class="m-0" style="font-width:bold; font-size:2rem;">${data.location.name}</p>
                    <p class="m-0" style="font-width:bold; font-size:4rem;"> ${data.current.temp_c}<sup>°C</sup></p>
                </div>
            </div>
            `;
        console.log('printing data', data);
        document.getElementById('output').innerHTML = output;
    }).catch((err) => console.log(err))
}
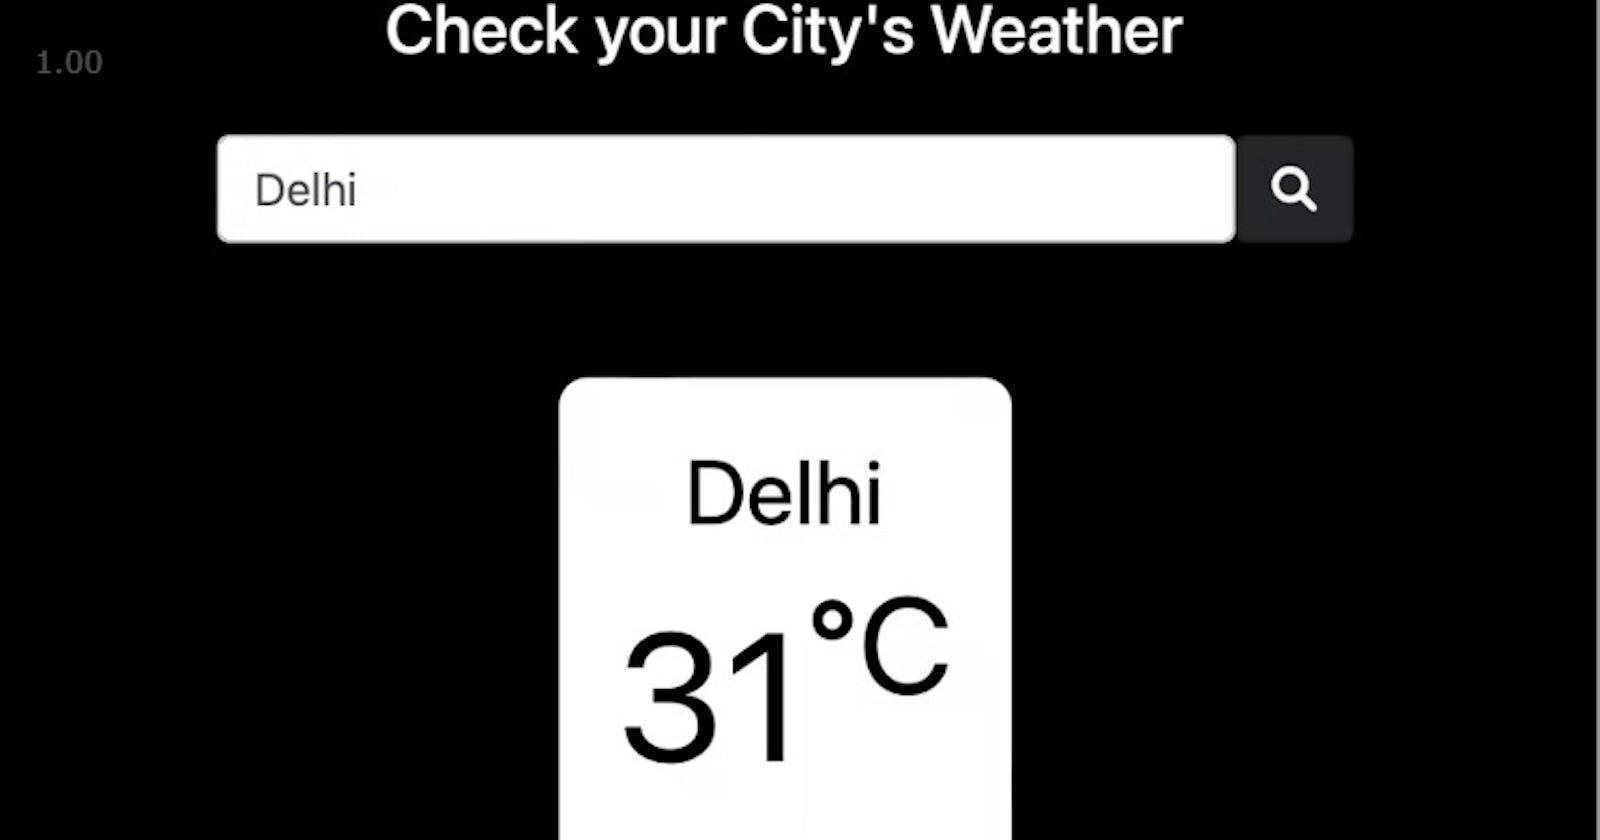
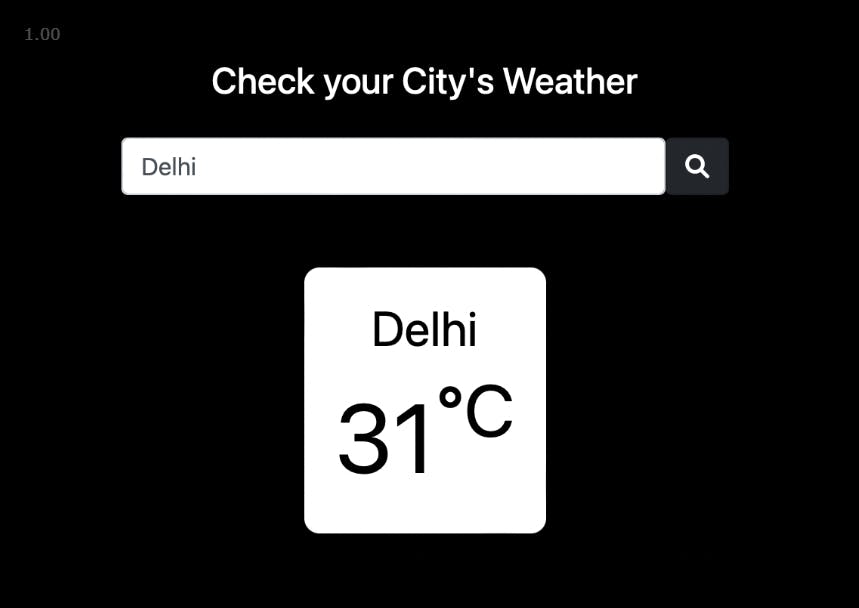
This block of code will add functionality to our code.
Output:
Closing note
Incorporating weather API into your website can be a fun and rewarding project, and Weather API makes it easier than ever before. I hope that this guide has inspired you to try it out and take your website to the next level. For more exciting tech and coding tips, be sure to follow me and stay tuned for future blog posts. Don't forget to give this post a like if you found it helpful!
Thank you 💓